Van’s Practice Kit
2022-02-06
I started the Lightbox project but am waiting on a replacement skin for the bottom of the box. While I wait on that I started the Control Surface Practice Kit.
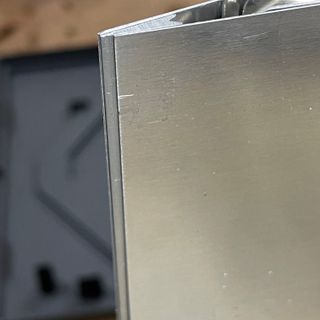
I have not gotten too far in it but it is exciting as this is much more like what I imagine the actual build to be like. I had a chance to try out deburring withe Scotchbrite wheels, some back riveting, and simple fabrication of some stiffeners.
2022-02-19
Well made a bit of a mess of attaching the plates with -4 universal head rivets. Tried my new squeezer but used it incorrectly, bending the spar. I could not seem to get the squeezer to do its thing on those -4 rivets. Ended up driving them with a bucking bar and that worked well until I smashed a finger. Good learning lessons.
2022-03-06
This project is exposing all sorts of learning opportunities. I cleco’ed the skins to the spars then drilled out the holes in the spars. Went to go work on the trailing edge and long and behold, the skins do not align. Off by 0.0815”. Asked on VAF and found out that there is a orientation to the spars. Meaning, I have to flip the skins to the other side. That fixed it but now all my matched holes don’t align.
If this was the real project, I would probably have to replace the spars instead of turning it into swiss cheese. But given the backorders at Van’s, I will live with my mistake and re-drill the spar holes and hope it is not too much of a mess.
2022-03-14
Finished my toolbench where I now have my drillpress, bandsaw, and deburring setup on. Worked on turning the spar into swiss cheese, which btw, it is a mess. Decided to chase the rabbit by working on the tail edge of the practice peace. Guess what? More learnings.
I built a template to get the angle of the drill surface to drill through the edge and into the wedge and other wing surface. Had a couple issues with this though:
- The drill press was having a hard time not wandering on the surface. Got an elongated #30 hole out of the deal. Move to hand drilling and did not fair much better.
- Noticed that the drill press has a little bit of wobble in it. Will investigate a bit more to see why this is
- The row of holes in trailing edge is a mess. Many are not in alignment with each other. In one I somehow double drilled through and now have two holes for the price of one.
Definitely a good learning experience. I would order another kit if Van’s was not so back ordered. But I will need to make sure I have enough scrap on hand to setup jigs and test heavily before I work on final pieces.
2022-03-19
Using the Countersink Jib by Cleavand for the training edge was very satisfying. Clamped it to the drill press table and wired the cage to the clamp. Besides the line of rivets being cattywampus it cleaned up just nice.
The cframe did a great job dimpling the skins, spars and ribs. Did not need to do much additional deburring to get the proper depth on the spars per the instructions.
Was able to flat rivet the skins to the spars and start down the ribs. Got to the small spot in the ribs and need to see how best to set these as my rivet bucking bar is too big to get in there.
Overall a satisfying couple of hours.
May 2022
Spent more time then I logged just doing excercises. Put in 100 rivets, take 100 out. Really turned the practice wing kit into swiss cheese. Good practice though. Researched a bit on the best techniques for removing rivets and found the great kitplane videos, metal magic.
The final chapter for the wing kit is when I cut it up into scrap for testing priming. Thank you wing kit for your service.